In Short
The fastest way to print your effects in Pro Tools is to use the Commit Tracks feature, this allows you to print the audio including the plugins on the track. However, if you want some old school tracking with effects and want to create a preset, then here’s how.
In Depth
First, a short note about Commit Track.
Commit Track
This is effectively track freeze by another name and includes a number of interesting features:
Commit the entire track with all inserts included
Commit only up to the insert which means Pro Tools renders the instrument but without the inserts beyond it in the chain.
You can commit the whole track or just an edit selection.
You can copy the send and group assignments to the new track, so if you have a set of drums in a VI already going a a buss then the buss selection will be copied as well as the group settings.
There are several options to make the committed track inactive, hidden, deleted to do nothing.
This also works on a VI with multiple outputs.
Old School Tracking
One of the great features of a modern DAW is the ability to track your audio clean and then, with plugins, to change the sound after the event. But what if you want to print the audio as it sounds, as you record? We show you how.
Some may want to record clean tracks, however there is something to be said to committing the sounds as you go. It means you can build up the song knowing the sound of each element, and therefore create an arrangement with this in mind.
The second reason is that you are not relying on the plugins later down the road. What if the mix is sent to another studio, or mixed by another person who doesn’t have the same plugins installed?
Whatever the reason, some think tracking like this is a better option. In this article we are going to show you how to set up a ‘print’ track in Pro Tools in addition to your clean track, place them both in a folder, and then save it as a track preset that you can recall as often as you wish.
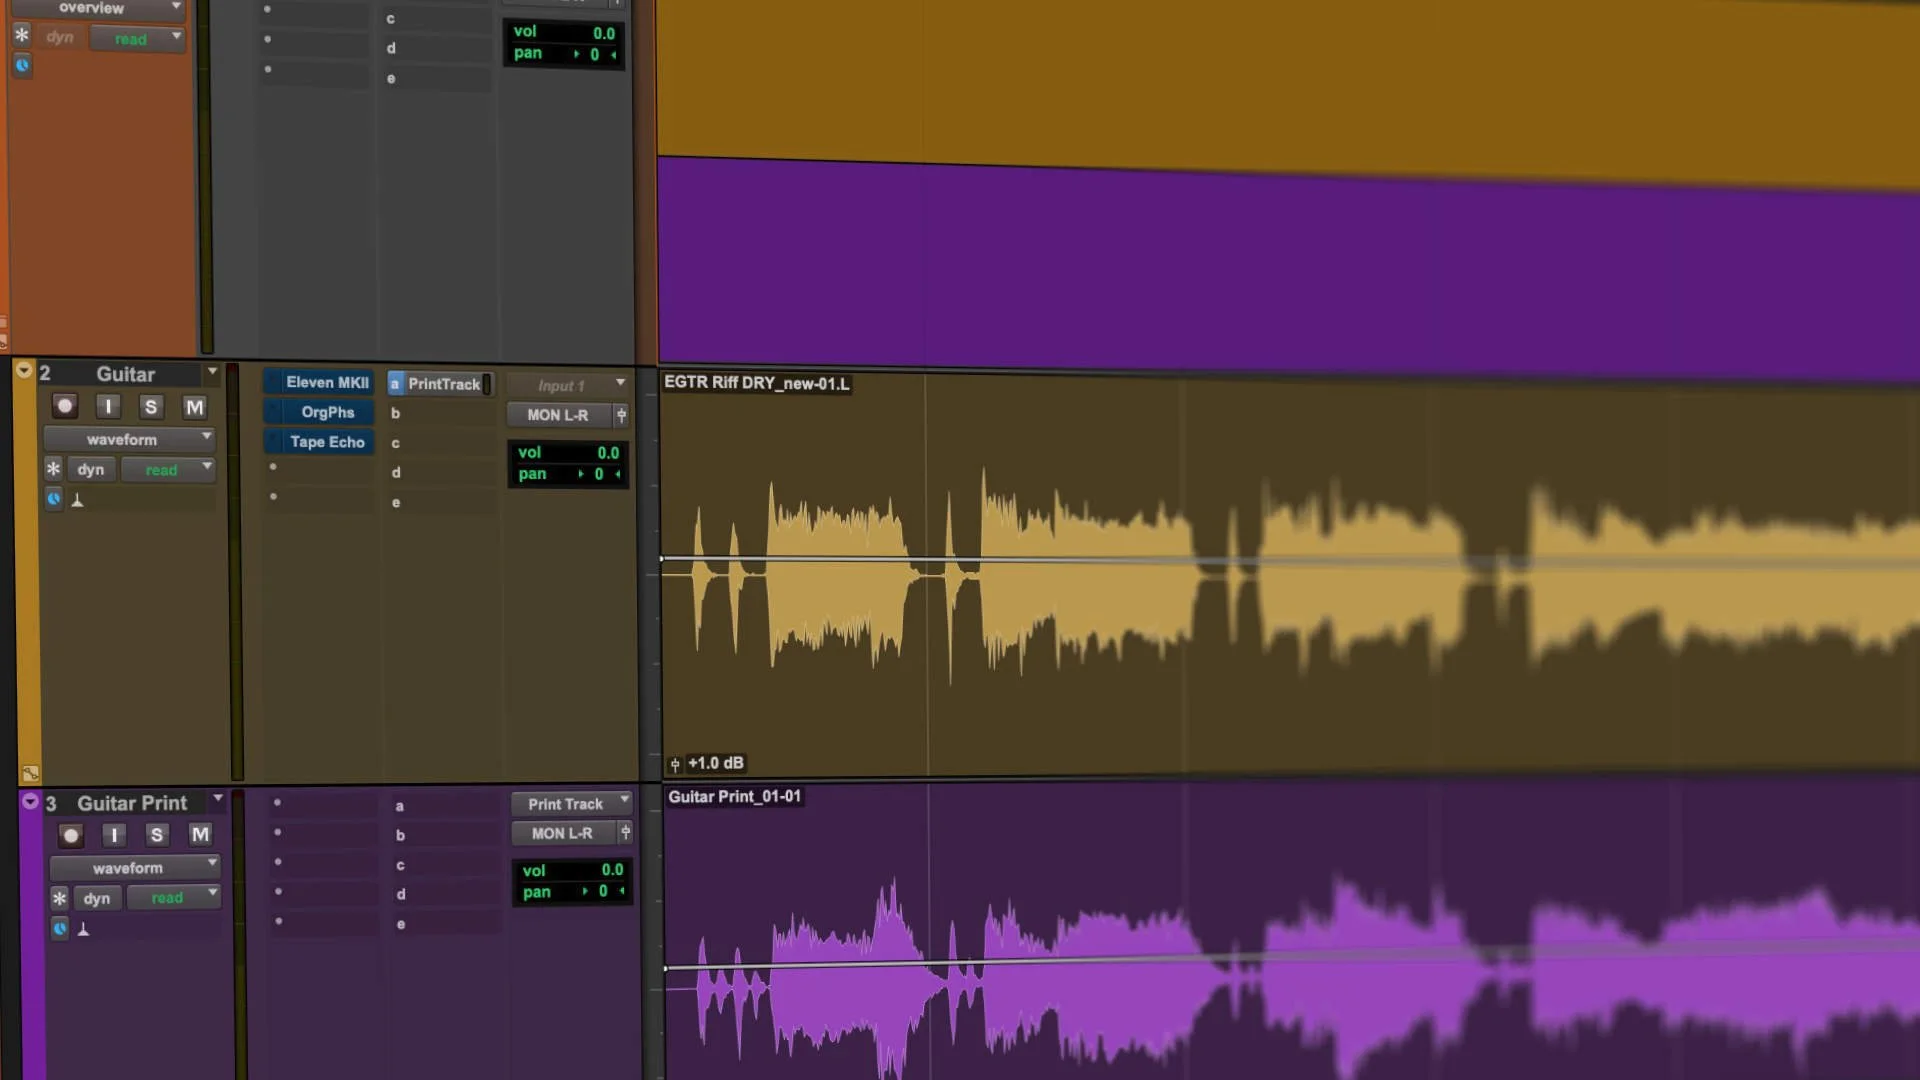
Both tracks nested in a folder
Doing this you end up with both a clean track and a track with the sound of the plugins printed.
First create two audio tracks, they can be mono, or stereo, whatever you need. If you are building presets, then we suggest making one of each.
Next, create a send of the same track width (mono or stereo) to match the track you are sending to. In this example we are tracking an electric guitar on a mono track, so we’re chosing mono. Assign it to a bus in Pro Tools, give it a meaningful name if you wish.
You may also want to go into the Pro Tools I/O settings and save them using the Export Settings option in the bottom left of the I/O window. You don’t need to use this step, it just means if the I/O settings get changed you can open them and the assignments should match.
Set the send on the first channel to Pre Send and also set the fader to 0db, so that it sends enough audio out to the next track via the bus. You may need to adjust this if your plugins add too much gain to the signal to prevent clipping on the print track.
Save this as a track preset in Pro Tools so you can use it in other sessions.
Now when you record you set both tracks to record, but don’t enable the input monitoring on the second print track that is being fed from the bus. This means you only hear the input on the first track.
When you record both tracks will record. Even though there are plugins on the first track it will record a clean signal. If you disable the plugins on the first track you will hear the audio as if no plugins were present when you recorded.
However, on the print track you will have audio that has the sound with the plugins applied. How you choose to use the tracks is entirely up to you. You can disable the plugins on the first track and have the track clean, add new plugins, or leave it as it is. What you have now is choices.
In the video below you can see and hear the audio on both the orginal track as it hit the channel, pre effects, and also the print track… just like the ‘good old days’ of tape.
Before saving it as a track preset you may want to create a folder to nest both tracks within. To save it as a preset it’s simple. See the images below.
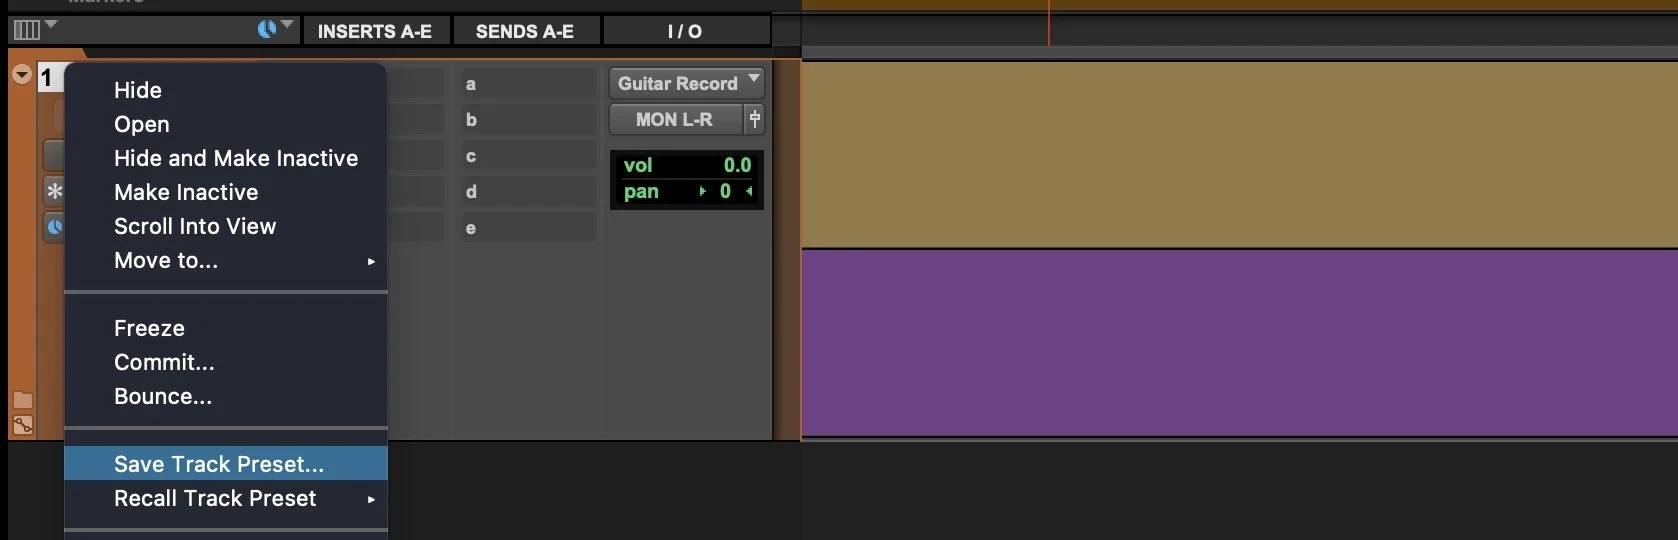
Right mouse click on the track and choose ‘Save Track Preset’ or Option+Shift+P

To load the new preset, go to the New Tracks dialogue and navigate to track presets at the bottom
That’s it. Other DAWs also offer folders and tracks presets, so refer to your owners manual to see how to do this in your DAW of choice.