

There’s a lot to think about on a film shoot and it’s easy to get things wrong, especially when working to tight time constraints and with a very small crew. There are, however, a number of fairly simple points to take into account and check, either ahead of the shoot or as you start to set up. Having a checklist of things to consider can save many a headache and help to avoid the need for re-shoots. Let’s look at some of the key points.
Frame Rate
One of the most basic things to check at the very beginning is the frame rate. Everyone involved with cameras or audio should be aware of this, and equipment should be set up for it prior to shooting. This is critically important because mixing frame rates in the edit will have a detrimental effect on the footage. Playing footage back at anything other than its native rate in the edit causes artefacts like ghosting or motion errors. As a general rule, there should be one frame rate for a project and everyone should stick to it.
In some cases, and assuming a sufficient level of technical knowhow on the part of the operator, there are instances in which a camera can be intentionally set to run at a different rate to that of the project. The most obvious of these are slow motion or time-lapse shots. Shooting at a higher rate and then conforming the footage to the project rate in the edit is an effective way to give smooth slow motion. Conversely, shooting at a lower rate is the best way to capture a time-lapse which can then be conformed to the project rate in the edit. Just be sure to remember to switch the camera’s frame rate back again before recommencing normal shooting.
To add one final point to the subject of intentionally setting a different frame rate to that of the project, on rare occasions you may wish to deliberately overcrank or undercrank the camera. This is a technique which has existed for decades in motion picture production and it involves running the camera at a slightly different frame rate in order to create a subtle speed change in the edit. For example, running the cameras at 23fps on a 24fps project can be a useful technique to give a slight speed increase in the final version. This has been used for car chases and fight scenes in many films you’ll be familiar with. The process is similar to that taken when shooting a time-lapse, except the rate for a time-lapse would be vastly slower compared to undercranking which typically involves a frame rate adjustment of just 1 or 2 frames per second. The opposite, overcranking, can be used in cases where you intentionally want to subtly slow something down. In either case, the resulting footage needs to be conformed to the project rate prior to editing.
No discussion about frame rates would be complete without mentioning timecode. On multi camera shoots, and when audio is recorded separately, timecode should be fed into all devices at the project frame rate. It’s often down to the sound recordist to provide this timecode so they need to also set this up at the very beginning of the shoot.
Resolution And Colour Profile
In addition to frame rate, the other big thing to check at the beginning of every shoot is the resolution you should be shooting in. Is it 1080, 3840, 4096, 6K, 8K or another one of the many available resolutions? Accidentally shooting at 1080p on a 4K shoot makes the footage largely unusable due to the lower resolution. Sometimes it can be worth shooting at a slightly higher resolution to allow for scaling of the image in post. Consider whether this is necessary at the start. Something which is closely tied to resolution is aspect ratio. Typically you’ll be shooting ‘full frame’, meaning that what you capture is what viewers will see. Sometimes though, footage may be cropped in post, as can be the case when shooting for the wider 2.39:1 aspect ratio. In this case, your camera might be capturing 4096x2160 but this would be cropped to 4096x1716 in the final version. Using black bars on the camera view finder at the top and bottom of the image at the time of shooting provides a guide for framing for the wider aspect.
The colour profile is another major point to check too. Are you shooting in a conventional SDR format like REC.709, or shooting with a log colour profile? Log captures a wider dynamic range and provides much more versatility for colour grading in the edit, including grading to HDR if required.
Even with the frame rate, resolution and colour profile set, there are often still options for video codec on the camera. Once again, agree this and set it up as needed before rolling.

Batteries And Power
Before going to a location for a shoot, consider how you’re going to power the equipment. Will there be power available or will you need to run everything off batteries? It’s always worth taking fully charged batteries even if there is a power supply because sometimes it’s more practical than running cables, especially when the nearest socket is on the other ride of the room. Suffice to say, take enough power cables to cover every possible eventuality at the location and make sure all batteries are fully charged ahead of time. When shooting abroad, take the necessary plug adapters.
Storage
Related to everything we’ve mentioned so far is storage. The last thing you want mid shoot is to run out of card space. Make sure that you have enough capacity to record everything you need to. Format cards or SSDs ahead of shooting. Also, have provision for copying data and creating backups of footage and audio once it’s captured. Bring a laptop, card readers and additional storage to do this. This is true not only of camera footage but also audio, which brings me onto the next topic…
Sound
Without going into all of the intricacies of what sound recording can involve, at the most basic level, once microphones are positioned, somebody needs to actually check how it sounds. That might sound like the absolute bare minimum requirement but I frequently receive location audio which is either clipped, far too quiet, muffled, full of excessive background noise or dropping out. Even on the smallest shoot where there might be one camera operator who is also recording sound, the audio needs to be monitored and evaluated throughout. Never assume that just because it starts out sounding fine it will continue to. Radio mics can occasionally be subject to interference or even drop outs. Check that they have sufficient battery levels at the start. Also, don’t scrimp on AA batteries by using the cheap ones from discount stores. They deplete very quickly and you’ll only find yourself constantly swapping them. Good ones such as the Duracell ProCell batteries are well worth the money.
At the start of a shoot you have control over certain background noise, at least when shooting indoors. Switch off noisy air conditioning before filming and, when shooting in settings with background music playing, see if you can get it switched off before you start rolling. Even an open window can add a lot of unnecessary noise so, if it’s not essential to the shot, close it.
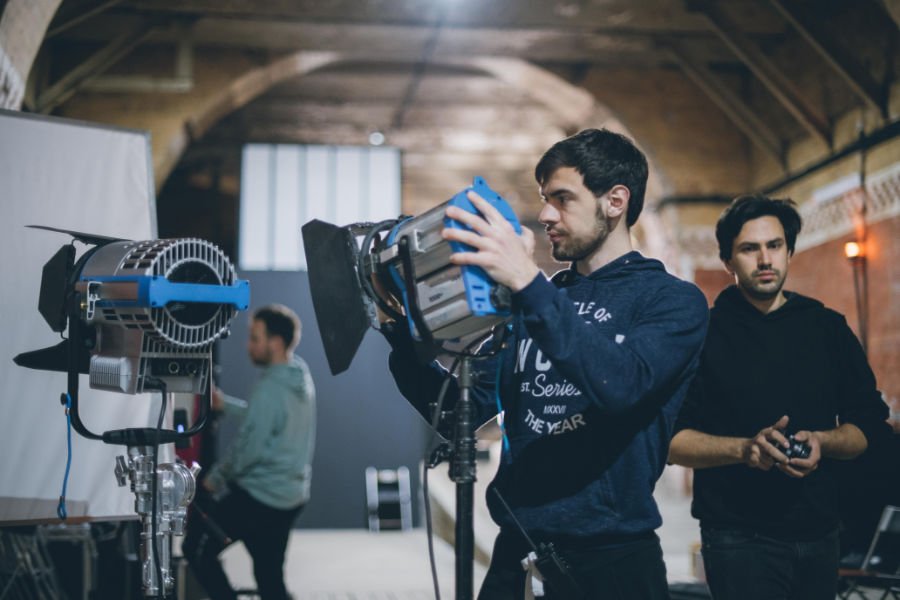
Lighting
If you have the luxury of having a dedicated lighting person then this point isn’t one you’ll need to worry about. However, on small shoots the lighting might be down to you. Lighting can take a while to set up properly but in the first few minutes of setting up for a shoot you can at least consider where you’re likely to need lights and what the colour temperature might be. When shooting in a space which has a lot of natural daylight coming in, you may be able to get away with no lights but if you need something to supplement the daylight for lighting people’s faces, it’s a good idea to match the colour temperature of the daylight. A setting of around 5500 to 6500k should do the trick in this scenario. Also, think about where cameras will be positioned in relation to the lights so you can place them where they won’t appear in shot. Be aware of mirrors or people’s glasses which might make the lights visible to the cameras in the reflection.
The Room
When shooting indoors there are a number of things to check at the start of a shoot. Aside from the obvious point of setting up a shot which looks nice, you should also check that there’s nothing in shot which shouldn’t be. For example, drink bottles in the background or bits of equipment you’ve left lying around. When shooting in a location such as an office, where other people might be able to access the room, put up a sign outside to let them know that filming is in progress and that they should be quiet. Sometimes the signs might need to also be positioned further down corridors so you don’t get interrupted by people talking loudly as they pass the room. Once you’ve set up, ask the crew quiet to be quiet for a minute or so to allow you to capture some room tone. Room tone recordings are very useful in post to bridge gaps in dialogue during the edit. Even the slightest noise of someone shuffling around can mess up a room tone recording so be strict about asking people to be still.
Conclusion
Getting the basics right prior to filming makes for a better production in every way. Importantly, it makes the post production job easier by creating footage and sound which is as free of problems as possible. By checking a few key points before any cameras roll, you stand the best chance of creating something which looks and sounds great.
Boom mic photo by Voyage Pro on Unsplash
