
If you work in a studio with a separate live area and control room you’ll know all about how good, easy communication between the engineer and musicians makes a session easier, faster and far less stressful. If you’ve ever found yourself gesticulating through the glass you probably need a better communication system.
In this article we look at some easy tricks you can employ to make your talkback and listen mics work for you. Best of all they are free!
Even if you don’t have a studio which has a live area, you might well set up ad hoc recording setups for band tracking – taking a computer, interface and mics to a suitable venue to access those larger spaces which can make tracking sessions so much easier, and drum sounds so much more impressive! With cheap cameras so accessible, if you want to set up in a separate room from the band and forgo the advantages of having a line of sight, you can even set up a video link comparatively easily. If you’re not worried about latency on the video feed you can even use phone and tablet apps.
However this does still leave the audio talkback. Setting up talkback from the engineer to the performer’s headphones is straightforward enough. If you don’t have a dedicated talkback function with a momentary/latching talkback button you could consider doing what live engineers have been doing for years and using a cheap, switched dynamic mic. Routing this to the performer’s headphones is easy enough in any DAW. A really important additional consideration is having an active speaker set up in the live area routed to the same talkback mic, as performers have a habit of taking their headphones off as soon as a take is finished. You can talk as much as you like but if the person you’re trying to talk to doesn’t have their headphones on they won’t hear you!
A spare active monitor or cheap speaker of any description, put out in the live area can be used to communicate with those headphone-removing musos. Wall mounting is great in a studio but if you are recording in a temporary setting just pop it somewhere it won’t get kicked and you’ll be fine.
There are ways to automate the talkback mic so it is open whenever the transport isn’t rolling. I prefer to have manual control. Any good monitor controller will have the facility to momentary press open the engineer’s talkback mic while depressed but a double press to latch it open. However the communication from the performers back to the engineer, the so-called Listen Mic is more complicated. Here we share a handful of techniques you can employ to make this open mic less of a loaded gun.
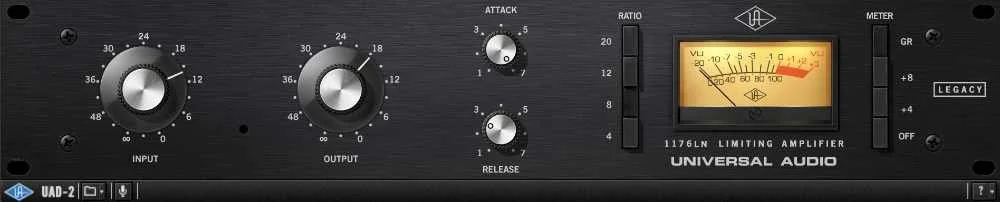
1176
Listen Mic Compressor
Listen mics are possibly better known for being responsible for epic drum sounds when misappropriated into recording duties. A listen mic tends to be something like an omnidirectional condenser put in the middle of the live area so all performers can be heard over it. Because for someone who is well off mic to be heard a lot of gain is necessary, if someone hits a drum or chugs a chord (and how many musicians do you know who won’t do that when left with their instrument for more that 10 seconds?) the results can be cone-tearingly loud in the control room.
Stopping loud things from getting too loud is easy enough. A limiter with a fast attack and a long release is all you need to protect yourself. A carefully set up limiter with similar settings is a very good idea on headphones too, as long as it can be done without introducing additional latency. The 1176 is the traditional choice for this but that’s largely historical. Speed is important here and back in the day the 1176 was the fastest thing out there. These days just use any utility compressor/limiter plugin.
Gating Out Loud Stuff With A Ducker
I recently received a call from a friend who was tracking a band in a studio. He was having issues with a “fidgety drummer”. A drummer who understood that it was inappropriate to play while people were talking via the listen mic, but then his attention wandered and… well, you know!
He asked whether there was a way to get the opposite of a gate, a dynamics process where audio passes below the threshold but is gated out above that threshold. I was pleased to be able to tell him that what he needed was a Ducker. ‘Ducking’ is often used as a word to describe externally keyed side-chain compression. They are similar but not identical. I wrote an article on this some time ago.
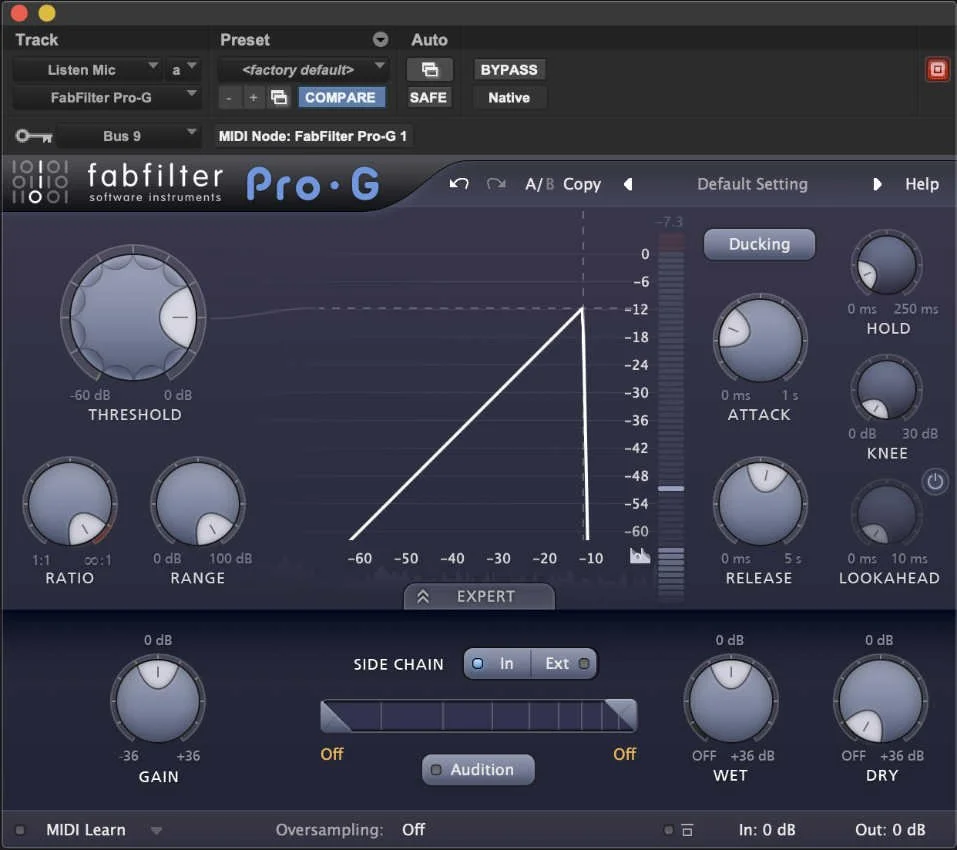
The details to that aren’t relevant in this example as the ducker being set up here is an extreme one. We’re looking for a transfer curve which looks like this:
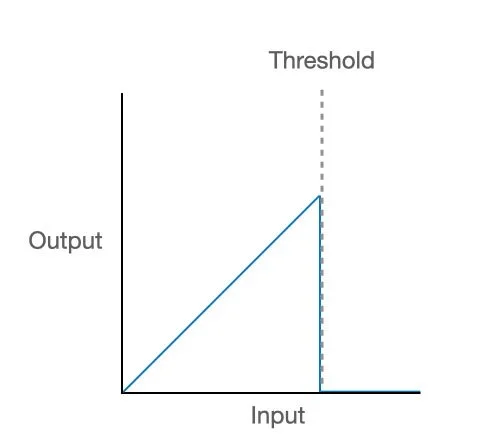
Ducker
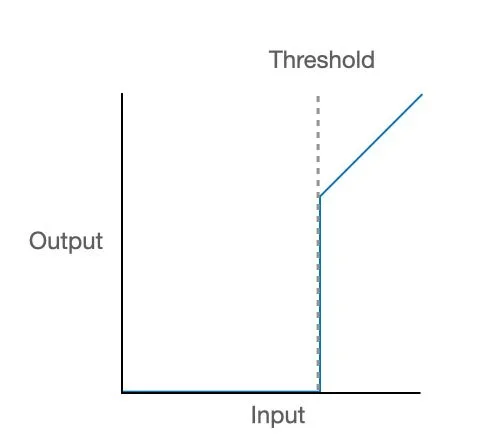
Gate
Compare this to the Gate curve and you’ll see what is going on. With an appropriately high threshold, speech is allowed to pass but loud sounds like drumming are muted altogether. While a limiter might be all you need it’s useful to know that you can mute rather than just limit loud sounds coming back at you. Speech from the performers coming via the listen mic will of course be muted but you’re unlikely to hear them anyway.
Mute Loud Stuff With A Ducker
Here are some appropriate settings using FabFilter’s Pro-G. My preferred plugin for this technique is Avid’s Pro Expander because it is available in AAX DSP.
Muting The Listen Mic During Playback And Record
By adjusting this Ducking approach you can set up a system where the listen mic is automatically muted during playback and recording. Using the external key input and some lateral thinking it’s easy to set up a system where the ducker is only open when the DAW transport isn’t in playback or record.
The way you do this is to set up an audio track with a print of a steady tone on it. You can create this using a Signal Generator plugin to make a sine wave but don’t try to use an aux return with a signal generator plugin on it. It won’t work. You have to have an audio print (though a MIDI note would work too).
In Pro Tools there is a handy shortcut you can use. Just make an edit selection on the track and hit Option+Control+Shift+3 (Alt+Start+Shift+3 on PC) and you will create an audio clip with a -20dB 1KHz sine wave to the length of your selection.
Route this tone track via a bus to the external key input of the ducker and set the side chain of the ducker to external. Set the threshold to just below the level of the sine wave and you’re all set.

Auto Mute Listen Mic
Now when your transport is stopped there is no sine wave reaching the key input and the ducker stays open. Hit play or roll in record and the tone track (which is routed to the side chain of the ducker and nowhere else - you don’t hear it) reaches the ducker and mutes the listen mic audio passing through it.
It’s an elegant solution. If that all sounds like too much work there is of course the very useful and very free Muteomatic from Sound Radix which does the same thing and in most DAWs offers the option to mute in record only. In the same way as some people like to convert MS to stereo and back using routing through the DAW’s mixer and a couple of Trim plugins and others just pop a plugin on the track to do it for them, if you are a “hands on” kind of person this way might be for you.
Watch The Feedback!
Lastly I’ll mention the importance of making sure that you aren’t potentially creating a feedback loop between the talkback, listen mic and the loudspeakers - you have been warned. Put those limiters in place. People playing instruments can’t take headphones off quickly. We’ve all done it once - make sure it’s only once!
Photo by Amin Asbaghipour from Pexels
