
The Pro Tools interface packs a lot of information into just a couple of windows. Occasionally you may come across a cryptic symbol or GUI element you aren’t familiar with. With buttons and the like you can always use the tooltips to get an instant description. Go into the Display Tab of the Pro Tools Preferences to enable Tool Tips, you can enable tips for function, details or both. But for many elements there isn’t a tooltip and if you don’t know what you are looking at you don’t know what to search for in the reference manual or online.
The Edit Window Rulers are one such place where such cryptic symbols can be found. Here are five to be aware of:
Song Start Marker
Often overlooked but always there, the red Song Start marker can be found at the extreme left of the tempo ruler. It’s automatically created and establishes a tempo for tick-based elements of a session.
The difference between absolute (sample) and relative (tick based) timebases is an important concept in a DAW, if you’re unclear about this distinction check out our explainer here. A beat is an arbitrary unit and can be any length depending on the tempo. The song start marker identifies this tempo, though of course it can, and often does change.
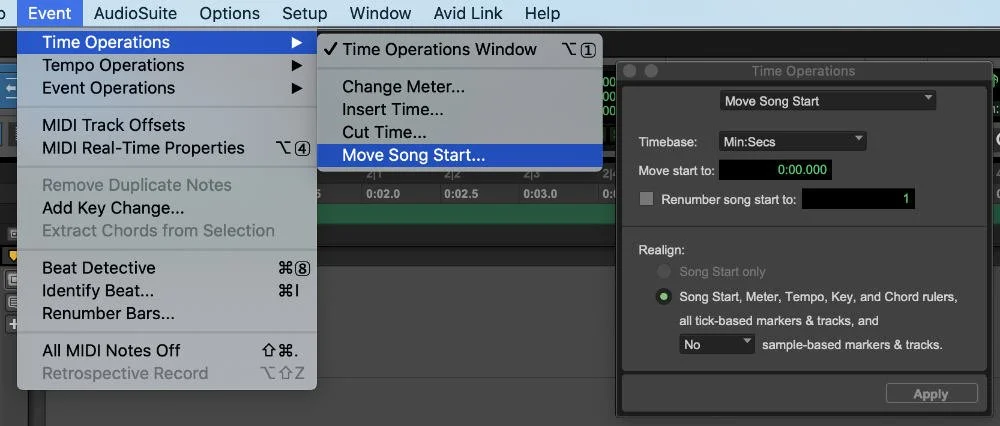
The Song Start Marker also identifies where the downbeat of beat 1, bar 1 is (AKA the song start…). You can move it by dragging it, but for more control over what happens when you do, go to Event Operations - Move Song Start.
Dynamic Transport Play Start Marker
Where playback starts from is usually controlled by the Timeline selection. There are two kinds of selections in Pro Tools: Edit selections and Timeline selections. Most of the time in Pro Tools you would have these linked but playback still starts from the beginning of the blue timeline selection in the ruler. Dynamic Transport mode allows you to start playback from anywhere on the timeline, which can be very useful.
Dynamic Transport decouples the playback location from the Timeline selection. This means that you can start playback from anywhere without losing your Timeline or Edit selections. When you enter Dynamic Transport from the Options Menu or by hitting CMD+Ctrl+P (Start+Ctrl+P on PC) the primary timebase ruler doubles in width and a blue Play Start Marker is displayed. This can be placed anywhere and playback will start from there. Playback is automatically looped in Dynamic Transport and moving this marker to just before the end of a looped selection can be really useful for auditioning loop points. If set before the loop it will act as a pre-roll, playing the pre-roll once and then looping. If placed beyond the selection it will play from that point while preserving the timeline selection, something which isn’t possible in standard transport modes.
Edit Selection Markers
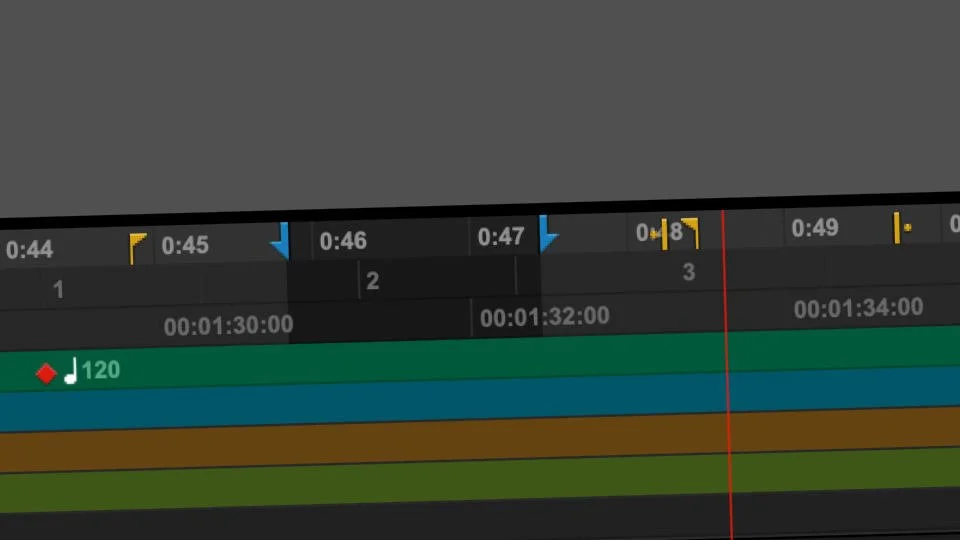
Dynamic Transport is an extension to the standard behaviour of Pro Tools in which a Timeline Selection controls playback and an Edit Selection control edits. The two are typically linked but if they are unlinked, using either the button in the toolbar or the shortcut Shift+/, then they can be set independently and rather than just the familiar blue downwards arrow which splits in half to indicate the beginning and end of a Timeline Selection, there also appears a pair of yellow lines with a single dot next to them. These are Edit Selection Markers and they give a visual indication of the location of the current Edit Selection even if the track on which the Edit Selection occurs isn’t visible. They can be moved, which will also change the Edit Selection.
‘Blue Triangle’
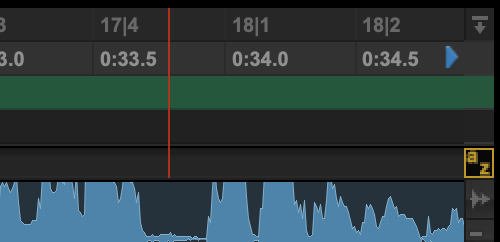
If you have edit window scrolling switched on in the default ‘Page’ setting then your playback cursor is always in view. We’ll leave Continuous and Playhead scroll to one side for now as they aren’t relevant here but if you use the ‘After Playback’ or ‘No Scrolling’ options you’ll find that when the cursor disappears off the right edge of the window an small blue triangle appears. This points to where the payback cursor has gone. If you prefer to work with scrolling switched off, which is something I do often, it can be clicked on to centre the playhead on the screen.
This way of working with scrolling switched off can be useful if you edit on the fly, with transport rolling. A useful shortcut is down arrow+right arrow which will centre the playhead like clicking the blue triangle.
Pre-Roll
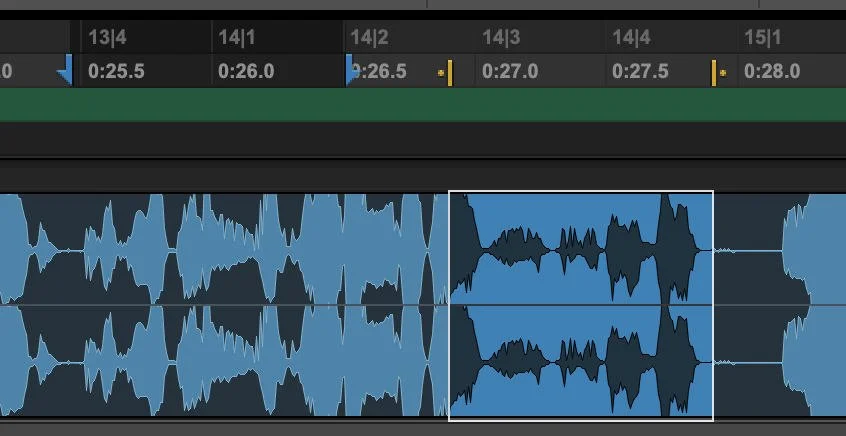
Pre Roll and Post Roll extends the timeline selection by a specified amount and is useful for drop-ins. When overdubbing it’s necessary to hear a little bit of the track before dropping into record and Pre-Roll facilitates this. Post roll does the same after the timeline selection. When set up, Pre and Post-Roll amounts are displayed as small flags either side of the timeline selection. When active they are yellow, when inactive they are white. They can be moved manually or set up in the Pre/Post Roll fields. Top tips for using Pre/Post Roll is to toggle it on and off using CMD+K (Ctrl+K on PC) and to Option/Alt+Click in the track you’re recording to to quickly set the Pre or Post Roll amount.
Check out the video below, brought to you with the support of Avid, to see these features demonstrated.
