Need to mix audio for 360 videos or VR but don’t quite know where to begin? Here’s a guide from our friends at Waves on how to set up an Ambisonics B-format mixing session, to get you started in no time. This Includes a free practice Pro Tools session provided by Waves.
Ambisonics B-format is the industry’s most widely used format for mixing audio for 360 videos and VR projects. Unlike typical surround sound formats (such as 5.1 / 7.1 etc) which associate each channel with a specific speaker, B-format consists of four channels which together represent the entire spherical soundfield.
To help you get started mixing in 360, here’s a simple practice kit you can download, with easy-to-follow instructions. This will help you get a hang of a basic 360 workflow.
In the download below, you’ll find a .zip file containing a ready-made Pro Tools demo session which you can use as an example.
Also found in the download are mono and stereo audio stems. Use them to create your own Pro Tools session from scratch.
You will need to log into your Waves account to access this free download. If you don't have a free Waves account you will have the option to create one. Once you have logged into your account you can either finish reading this tutorial on the Waves site or come back and read it here.
In addition to the above free download, you will need two Waves Ambisonics plug-ins:
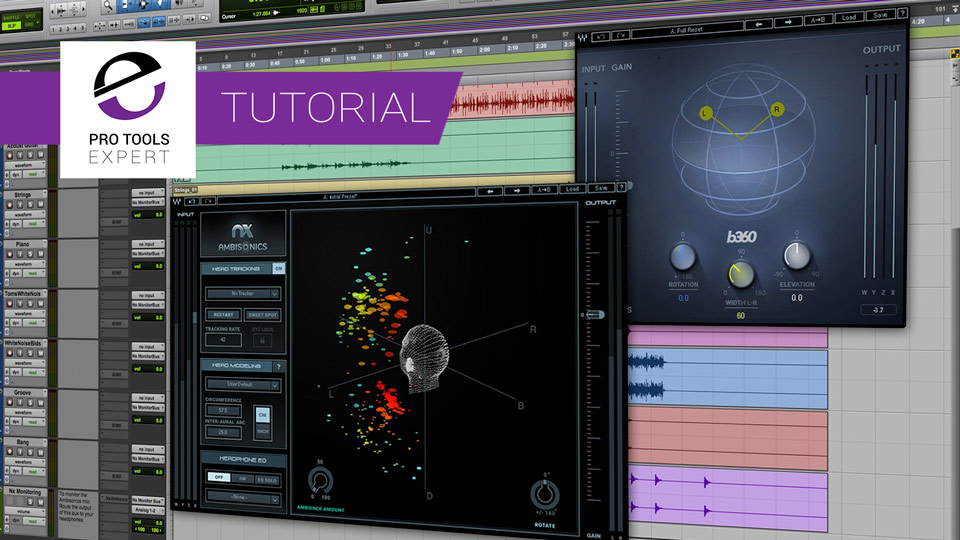
The B360 plug-in will enable you to mix in Ambisonics B-format by positioning the stems in the 360 audio field. The Nx Virtual Mix Room plugin (Nx Ambisonics component) will let you monitor in 360 Ambisonics B-format on any set of headphones.
If you don’t already own these plug-ins, you can download free 7-day demos – follow the links above.
Once you’ve downloaded everything, you can start by loading the demo session labelled "NX Ambisonics Demo Session.ptx" to familiarise yourself with the setup we're going to create.
When you're ready to create your very own Ambisonics mixing session, simply follow the step-by-step instructions below:
- Create a new Pro Tools session.
- Import mono/stereo stems to the session.
- Insert the B360 Ambisonics Encoder on each audio track – this will change the track’s output to a 4-channel configuration. (It is advised, though not a must, to open each instance of the B360 plugin on the track’s last insert point.)
- In Pro Tools' I/O settings, create a new 4-channel (Quad) Aux Buss and name it 'Nx Ambisonics’.
- Route the Nx Ambisonics Buss to your headphones for monitoring.
- Insert an instance of the Nx plugin (Ambisonics Quad/Stereo component) plugin on the Nx Ambisonics Buss.
Once done – You'll be able to position each track in the 360 spherical soundfield by using the B360 Ambisonics Encoder plugin and monitor the results using the Nx Ambisonics plugin.
Finally, when you want to bounce everything down to file:
- In the Pro Tools 'Bounce' window, select 'To Disk' and choose the Nx Ambisonics Buss as your bounce source
- Select .wav as the file type
- Set Format to 'Interleaved'.
- Bounce
This will then create what looks like a stereo Wav file, but upon opening it in an audio editor you will see 4 channels representing the Ambisonics quad 360 mix.
That’s it! You're now fully set up to mix, monitor and render Ambisonic audio with B360 and Nx.