So far we have looked at producing Pro Tools friendly AAFs from Avid’s Media Composer and Adobe’s Premiere Pro. In this article, we explain how to export a Pro Tools friendly AAF from DaVinci Resolve.
There is no doubt that working with DaVinci Resolve is the hardest NLE to extract a Pro Tools friendly AAF from.
Basic Method To Export An AAF From DaVinci Resolve
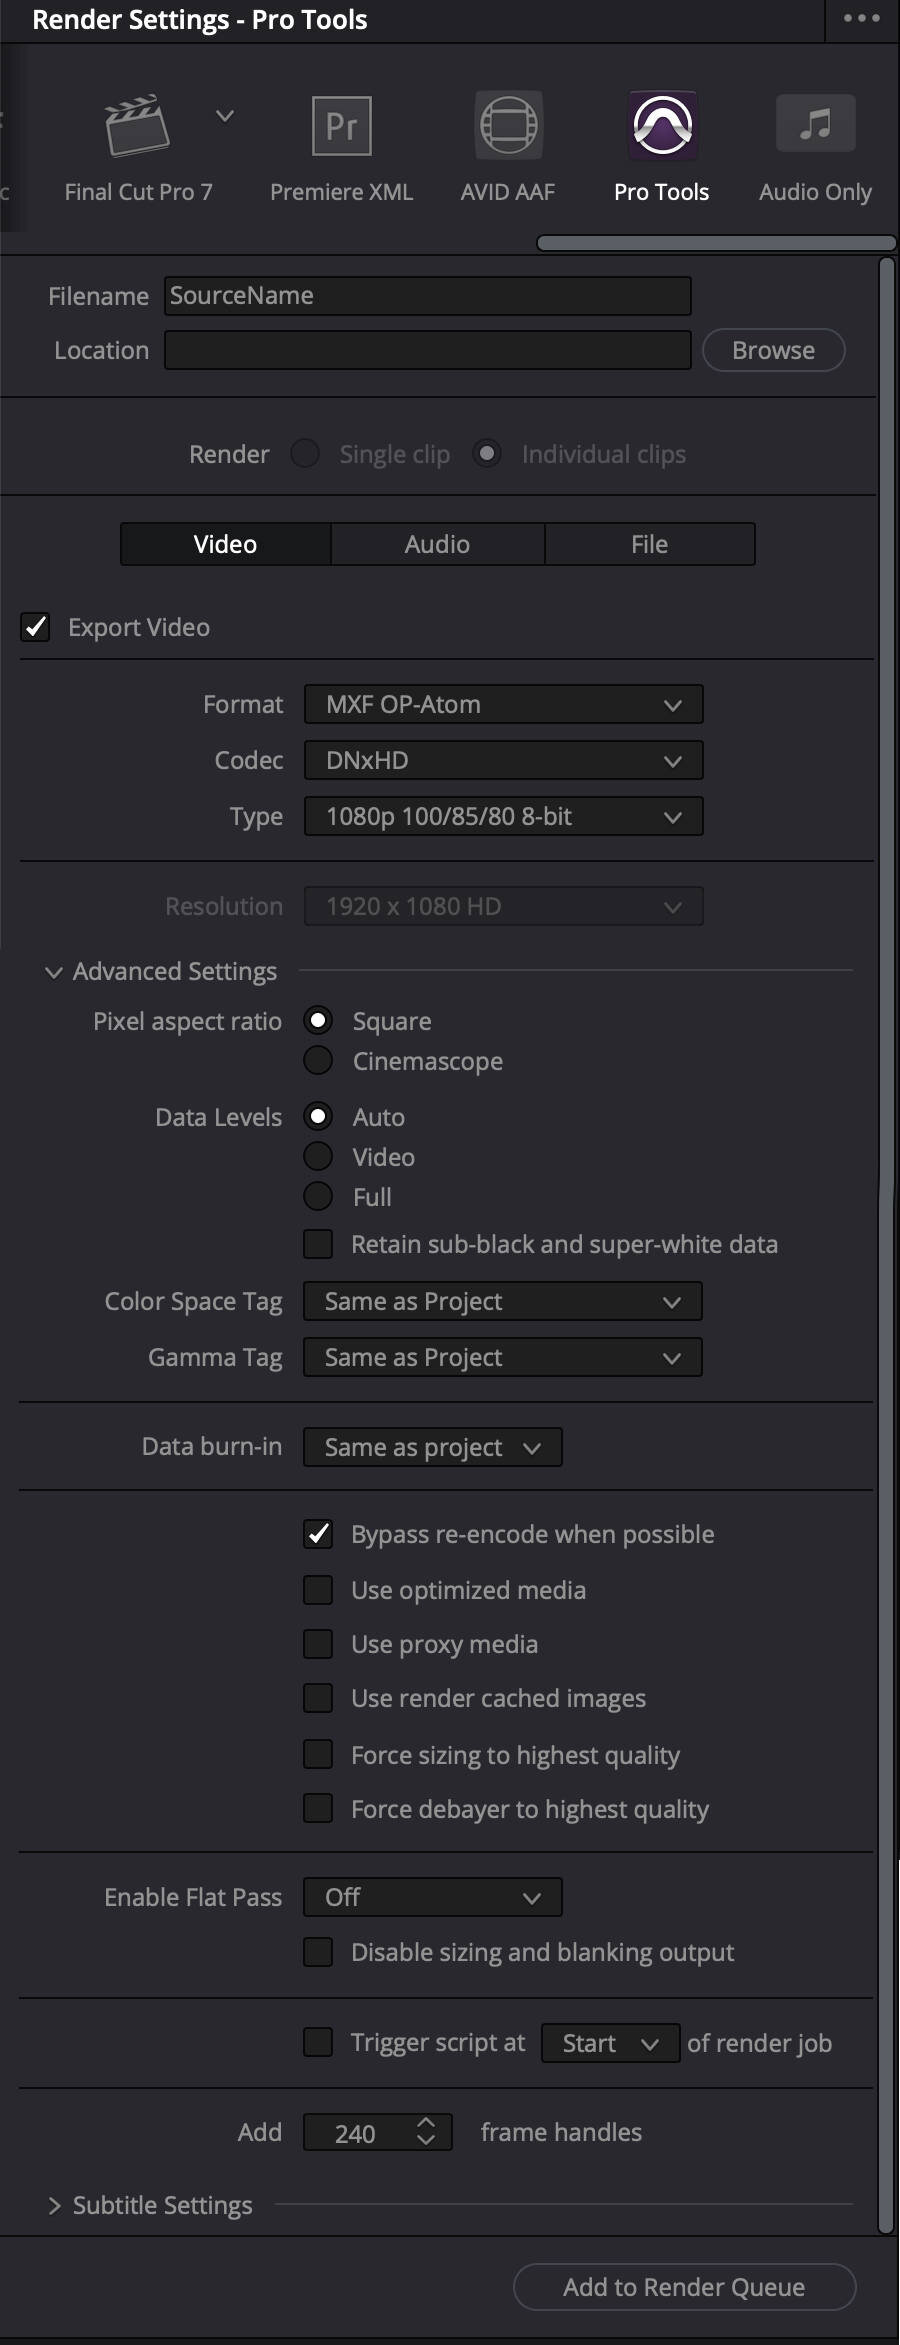
DaVinci Resolve Pro Tools Preset Video Tab
With the release of DaVinci Resolve version 16, Blackmagic Design, the custodians of DaVinci Resolve state that the Pro Tools Export window “has been dramatically improved”. We understand that there were further improvements to the AAF Export workflow with the release of Resolve 17.
However, we have seen reports that when importing an AAF from Resolve, especially v17, you need to have a very recent version of Pro Tools. It seems that older versions of Resolve and/or other versions of Pro Tools can cause issues. So get the latest versions of both.
The Pro Tools Rendering preset has been designed to present the appropriate options for exporting a specifically formatted AAF project file, linked audio files, and a linked reference video file to Pro Tools, or any application capable of importing a Pro Tools formatted AAF file.
Blackmagic Design makes it clear in the Resolve manual that when exporting using the Pro Tools preset, users must use the AAF file that’s automatically created and written to the target location because it’s formatted especially for Pro Tools and it contains path names reflecting the rendered clips.
If you are exporting an AAF for use in Pro Tools you should not export an AAF using the File > Export AAF/XML command, as this will not provide the correct exchange file for Pro Tools, and it won’t work correctly. Apparenty the Pro Tools preset will flatten all the video tracks on the timeline to one single video file, whereas the Avid preset will produce an AAF with all the video clips still on their respective tracks.

DaVinci Resolve Pro Tools Preset Audio Tab
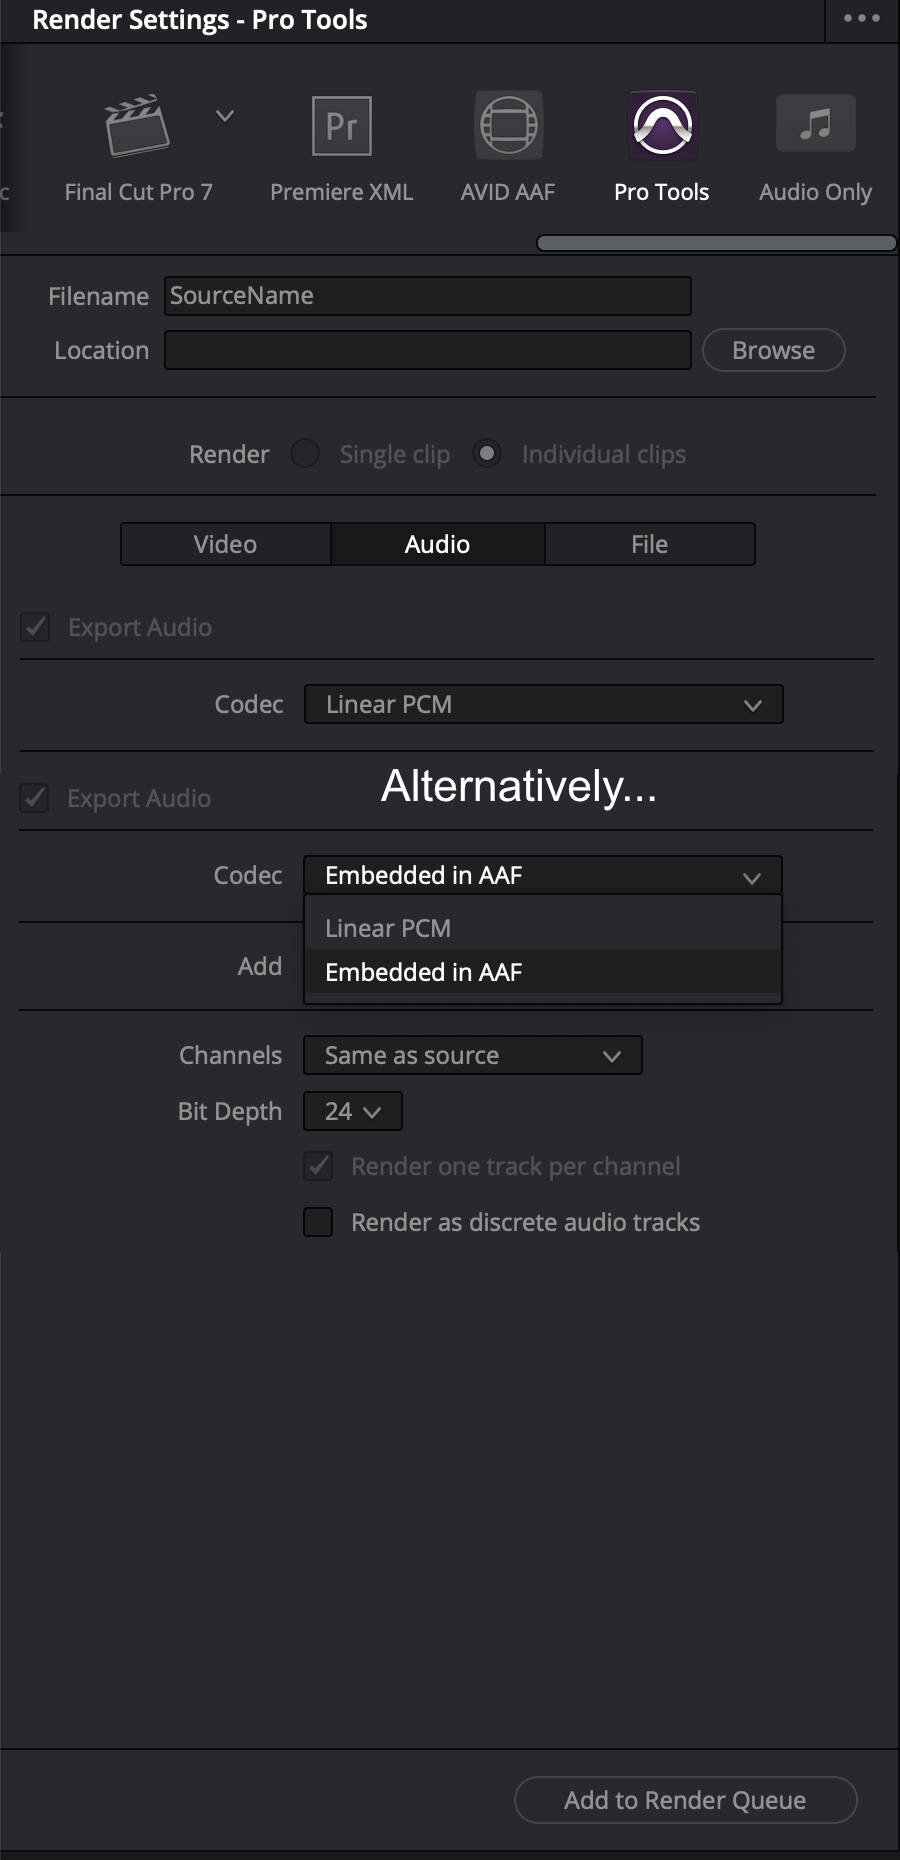
To start the AAF Export process select the Deliver tab at the bottom of the main Resolve window, which has a Rocket icon. In the Render Setting of the Deliver tab use the horizontal scroll bar and select the Pro Tools Preset. When you use the Pro Tools preset, DaVinci Resolve outputs the following:
Embedded Or Referenced AAFs - What you choose in the Codec drop-down menu of the Audio panel dictates whether you export the audio from the Timeline as a collection of files that link to a separate AAF, or an AAF with audio file embedded within as a single deliverable.
Choose Linear PCM to export individual files linked to a separate AAF interchange file, which will produce a referenced AAF and a folder full of audio files.
Choose Embedded in AAF to export an AAF with embedded Broadcast WAV audio files. This creates an embedded AAF, which is one file with the AAF EDL and all the media files in one file.

Assist using reel names from the: embedding in the source clip filename
Embedded Source Clip Metadata - Whilst we are in Clip Attributes we recommend that in the Clip Attributes window, select the Name tab and make sure that Embedded Source Clip Metadata is enabled. That way the metadata from the location footage should come across in the AAF Export. To speed up the process up, select all clips before you do this, so the option is enabled for every audio clip in the timeline.
If this option is greyed out go to Project Settings > General Options > Conform Options and check the Assist using reel names from the: option.
When this checkbox is turned on, DaVinci Resolve uses reel numbers when conforming clips to match any imported project. This setting must also be turned on if you want to choose different reel name extraction methods for individually selected clips using the Clip Attributes window. Turning this checkbox off forces DaVinci Resolve to identify clips using file names when conforming XML and AAF projects. File names can only be used for conforming XML or AAF files, or when importing a DaVinci Resolve project. There are four options and you want Embedding in source clip file: The manual says that this is useful for file formats where the reel number is embedded within the media file itself. QuickTime files created by Final Cut Pro, DPX frame files, and CinemaDNG files are all formats that are capable of containing reel number header data.

Render one track per channel
Mono Or Poly WAVs - Exporting mono tracks is the default in Resolve for the Pro Tools preset, with the Render one track per channel box checked in the Audio tab of the Pro Tools Render Setting. With this option, for example, a 5.1 polyphonic .wav file will be exported as six individual mono .wav files. If the Render one track per channel box is unchecked, DaVinci Resolve will output multichannel polyphonic .wav files instead. The safest option is to use the default settings and make sure that the Render one track per channel box is checked.
When we tested this with Resolve 17.2.2, we found that this option was checked but greyed out. We have been unable to establish why this is.
Muted Or Disabled Clips - Each exported file contains every audio channel from the source media, regardless of channels that have been muted in the audio panel of Clip Attributes. This means no matter how the video editor organises the channels of audio in the Timeline, all the audio files, muted or not, will be included in the AAF Export.
The same cannot be said for disabled clips on the Resolve timeline. We have seen reports that disabled clips cause problems in the AAF Export. Disabling a clip, effectively mutes the video in that clip but leaves the audio playing. If you don’t want the sound to play you will need to mute the clip. However, be aware that muted clips will be exported in the AAF and will no longer be muted so we strongly recommend that you duplicate the project in Resolve and then delete all the muted and disabled clips before you undertake the AAF Export.
Handles - You can also choose to include handles using the “Add X frame handles” option. In earlier versions of Resolve, this was only in the Advanced Settings of the Video panel and not the Audio Panel even though this relates to audio files. However, we found that in Resolve 17.2.2, that it was also in the Audio tab as well.
This option is there to add extra frames to the beginning and end of each exported audio clip. Typically the Handles would be anywhere between 6 and 10 seconds. Note, that like Media Composer and Premiere Pro, the Handles setting is in frames so you will need to multiple the frame rate by the number of seconds to set the correct Handle size here.
DaVinci Resolve Pro Tools Preset Video Tab
Video Format - - In the Video panel of the Pro Tools preset, the type of audio file that’s exported is determined by your choice of Format in the Video panel:
If you choose the MXF OP-Atom video format, then MXF audio files will be exported.
If you choose the QuickTime format, then Broadcast Wave files will be exported.
There are 2 schools of thought when it comes to video files and exporting an AAF to Pro Tools.
No Video Included in The AAF - To produce an AAF with no video file, you should uncheck the Export Video option in the Video tab. For the video file, use a different method to create a video ‘mixdown’ with a guide audio mix. Consider one of the other export presets in the Render window, maybe YouTube or Vimeo if you want a higher resolution video file.
Include the Video in the AAF Export - Using the Pro Tools preset, all the video clips in the Resolve timeline will be rendered and output as a single reference movie, in the format that’s selected in the Video panel, with all effects and titles baked in. The Codec should be set to DNxHD and The type to 1080p 36 8-bit.
When you output using the Pro Tools preset, an AAF of the audio tracks of the current Timeline is exported that’s formatted for import into Pro Tools or any other digital audio workstation (DAW) software that’s compatible with the Pro Tools style of AAF import.
Exported audio files have the file name and timecode of the source media they were extracted from, to enable relinking to the source media in Pro Tools, if necessary. In the case of Video+Audio files that have been synced in DaVinci Resolve, exported audio files are given the timecode and name of the synced audio source file, not that of the video clip.
Each audio track exports whatever custom name you may have given it, for use by Pro Tools.
All track and clip volume automation is exported, with all keyframes.
iXML metadata is also exported, including channel names when available.
No Effects - When you export to Pro Tools in the Deliver page, audio effects are neither exported nor baked in, which means that Fairlight FX, EQ, Compression, Pitch, and Elastic Wave effects will be ignored. If you are experiencing problems with imported AAF files, check to see if there are audio effects or audio compound clips in the Timeline, and replace any you find with duplicates of the same audio clips that have no effects.
Export Location - Make you set the location for the AAF Export file on your system. Do that from the Location option at the top of the Pro Tools Preset window. This will be where Resolve puts the AAF Export files when it has completed the Render processes. Also, make sure that the AAF Export file name is something useful that both the video editor and audio team can understand.
DaVinci Resolve Pro Tools Preset File Tab
Use Unique Filenames - In the File tab of the Pro Tool Preset, there is an option to create Unique Filenames. We have seen reports that this is not helpful.
When enabled, additional characters are added to every rendered media file to guarantee that each rendered media file has a completely independent name. This prevents multiple rendered clips from the same source media file from overwriting one another when saved to the same directory.
Uniquely named clips append the clip name with the track and clip number identifying a clip’s position in the currently selected session. For example, a clip that’s linked to a media file named “DropThatThingCU.mov,” and edited as the twenty-fifth clip on track V2, will be named “DropThatThingCU_V2-0025.mov” when rendered. When enabled, two other options are revealed.
What this means is that the file names in the AAF will not be the same as in the Resolve timeline. As long as you aren’t saving the AAF Export in the same folder as your original media, then there appears to be no need to have Use Unique Filenames enabled.
Start Render - Once you have all the settings as you would like you can click on the Add To Render Queue and then click on the Render All to set DaVinci Resolve creating the AAF Export.
COM Operation failed HRESULT - We have seen reports of some AAF Exports failing in Resolve 16.2. For example… When exporting an AAF using the ProTools preset on the delivery page, you get an error message: COM Operation failed HRESULT. The resulting AAF file is only 76 bytes in size. The reported solution is to remove all of your audio transitions from the timeline. For good measure, the person also removed all the duplicates in the timelines and removed all video as well and provided their sound mixer with a reference video from a separate export.
Audio FIles Not In Sync - Further investigation has shown that the issue can be triggered if you have an audio clip or a fade that is not frame accurate. Apparently, you can edit audio in subframe lengths but the AAFdoesn’’t support subframes so the error comes up.
The report also said that this was traced to Resolve rounding the audio clips which had not got exact frame lengths, which resulted in audio tracks with different lengths.
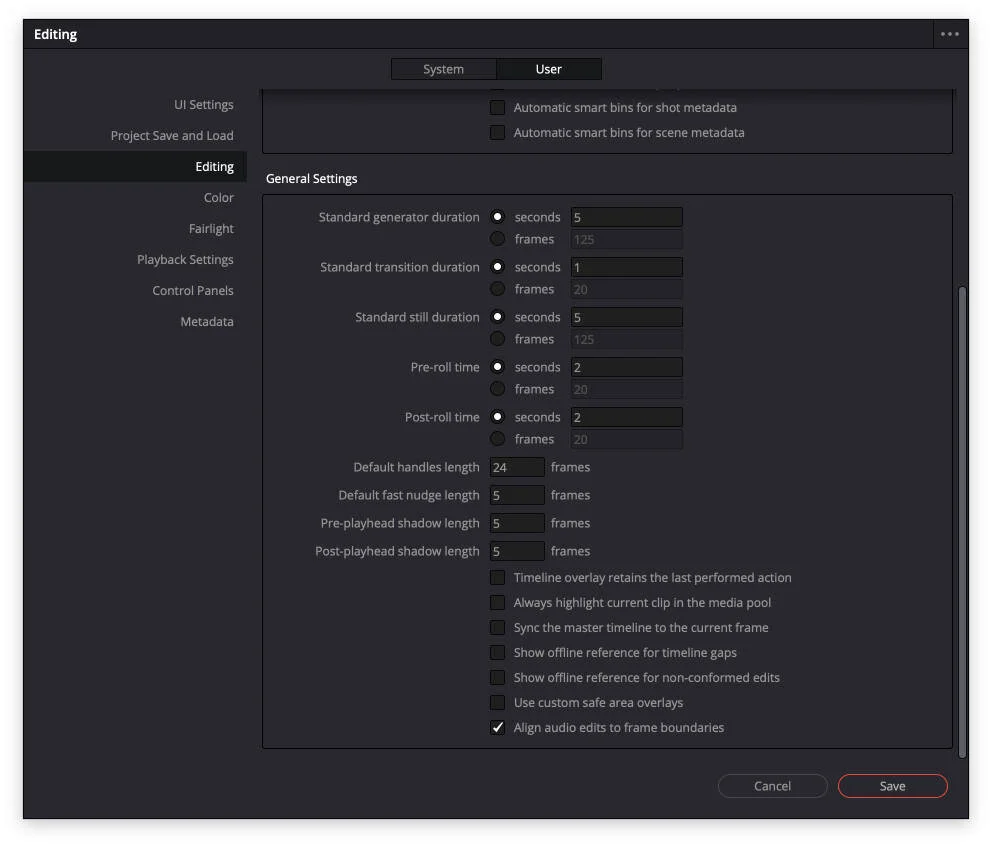
DaVinci Resolve Preferences Align Audio Edits To Frame Boundaries
Our advice is to check if you have any audio files or fades that are not an exact number of frames long. Apparently, it is better to work with crossfades, as these are an exact number of frames long. Or better still there is a setting in the Resolve Preferences - Resolve Preferences > User > Editing > General Settings > Align audio edits to frame boundaries. However, this isn’t a complete fix as when moving clips around the timeline in Resolve, it is possible to drag and drop them between the frame boundaries.
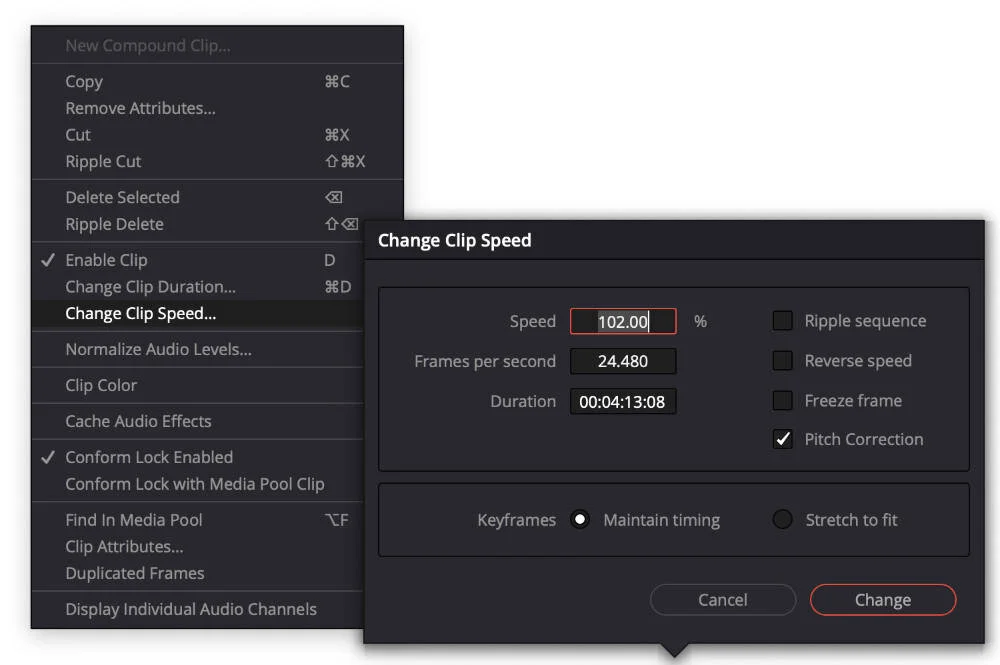
Change Speed Of Audio Clips
Audio Clips With Speed Change In Resolve - We have seen reports of Blank AAF Exports from Resolve being created if the timeline has any audio clips which have had a speed change made to them within Resolve. The solution is to remove those clips.
Using Premiere Pro Or Media Composer As An Intermediary
Although the above workflows should work and it is proving more reliable when using Resolve 17 and the latest version of Pro Tools, there are plenty of reports of grief when exporting AAFs from Resolve into Pro Tools.
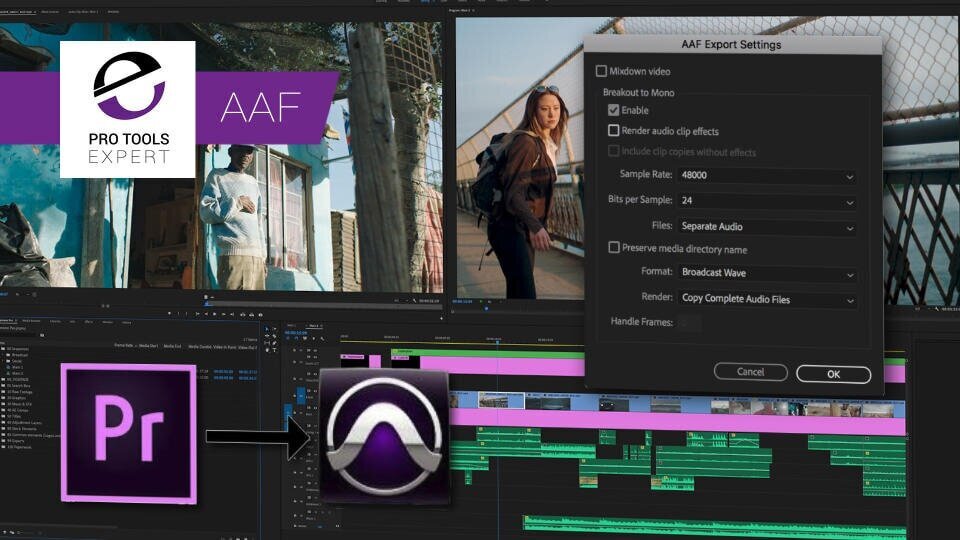
One workaround that seems to be gaining traction is to use Adobe Premiere Pro as an intermediary. The suggested workflow is to export an XML from DaVinci Resolve and then import that into Premiere Pro. Then undertake an AAF Export from the Premiere Pro. Check out our article How To Get Adobe Premiere Audio Into Pro Tools Using AAF.
Another workaround that has just come to our attention is to go via Avid’s Media Composer, by exporting the media as MXF files with an AAF and importing them into Media Composer and then export an AAF from Media Composer to Pro Tools. Check out our article How To Export A Pro Tools Friendly AAF From Avid Media Composer.
In Conclusion
In researching for this article, there is no doubt that the transition for audio files via an AAF from DaVinci Resolve to Pro Tools, is not a smooth path for a number of vocal users. That said, some users report having no problems, whilst others struggle to make it work.
Reading through many forums and groups some common threads started to pop up…
Make sure you are using the latest versions of both Pro Tools and DaVinci Resolve. It would appear that a lot of the problems that people have had, go away when you use the latest versions of both tools.
Problems with clips going out of sync. If this is your problem then I would direct you to the section in this article about clips not sitting on frame boundaries. That seems to be the issue here.
Problems with Metadata not coming through. If this your problem, consider using a referenced AAF and separate audio files. Again make sure that you are also using the latest versions of Resolve and Pro Tools.
Still, got problems? Then consider using Adobe Premiere Pro as the bridge between Resolve and Pro Tools. Export an XML from Resolve, open that in Premiere Pro and get the AAF from Premiere Pro and ope that in Pro Tools.
Ther you have it. We hope this has been helpful. If you have many constructive tips that have worked for you, that we haven’t covered in this article do add them in the comments below.